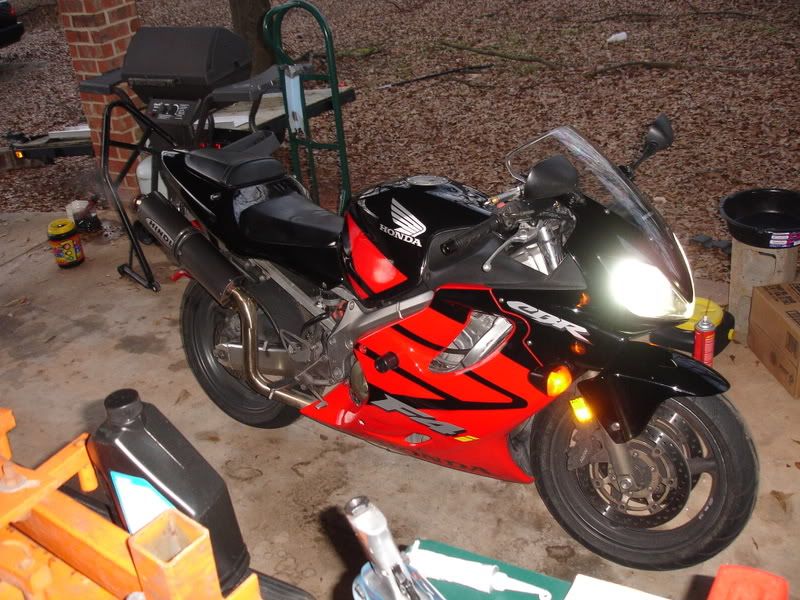
Annoyed by the clunky shifts and long throw of the gear shifter on your F4i (or other bikes too)?? Hate it when you get one of those 'missed shifts'?? This fairly simple mod aims to correct these issues! This involves the replacement of the shift star, detent arm, and detent spring. The replacement parts are made by Factory Pro, and uses a slightly modified shift star, micro roller bearing detent arm, and a heavier detent spring over stock. This mod makes a very noticeable difference in shift feel, making for nice clean, crisp, and faster shifts
I made this as detailed as I could, although I left out a few things in the pics but I'll explain as best I can
Cost
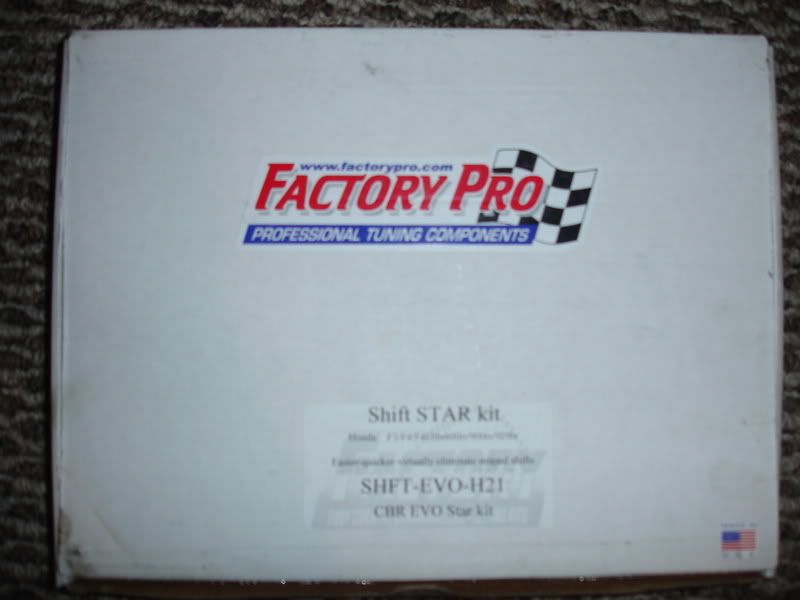
* $180 for the kit. I got mine from Solo Moto Parts they were about $20 cheaper than getting from Factory Pro, and free shipping on orders over $99
Bikes
* Any 01-06 F4i specifically. Probably very similar for others
Tools and Materials Required
* 30mm impact socket (1/2" drive)
* Impact gun STRONGLY recommended (electric or air, doesn't matter)
* 1/2" drive breaker bar if no impact gun is available
* 5mm and 6mm HEX head sockets (also called allen head)
* 8mm and 10mm sockets (1/4" drive)
* 10mm, 12mm, and 14mm sockets (3/8" drive)
* Short 1/2" drive extension
* 6 inch 3/8" extension
* 6 inch 1/4" extension
* 1/4" and 3/8" hand ratchets
* in-Lb torque wrench (3/8" drive) capable of 108 in-lbs
* ft-Lb torque wrench (1/2" drive) capable of 94 ft-lbs
* Medium sized flathead screwdriver
* 3+ lb hammer
* Rubber mallet (or rubber or wooden handle from regular hammer works too)
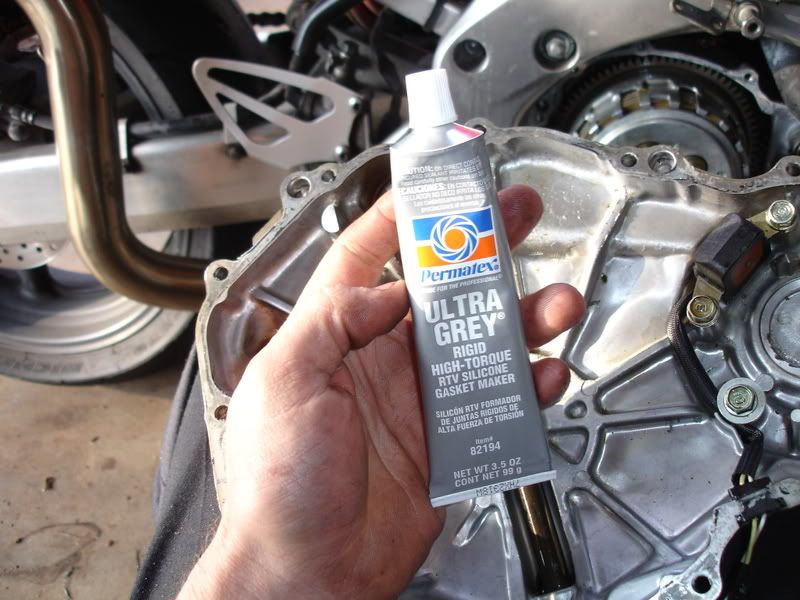
* Hondabond or equivalent GREY silicone gasket maker (must have high oil resistance!!)
* Brake parts cleaner
* Silicone gasket remover (not completely necessary, but helps)
* Blue loc-tite
* Digital caliper or micrometer (optional for measuring clutch discs and springs)
* Oil drain pan
* Clean engine oil (and oil filter too... might as well)
* Lots of shop rags
* Clutch center holder tool (optional special tool). Honda P/N 07724-0050002
Time Required: Depends on skill level, but for most mechanically inclined people, and especially those that are very anal and picky about everything, I'd allow a good part of an afternoon to complete
The Kit
![Image]()
![Image]()
Step 1
Drain the engine oil. Make sure the bike is in neutral
![Image]()
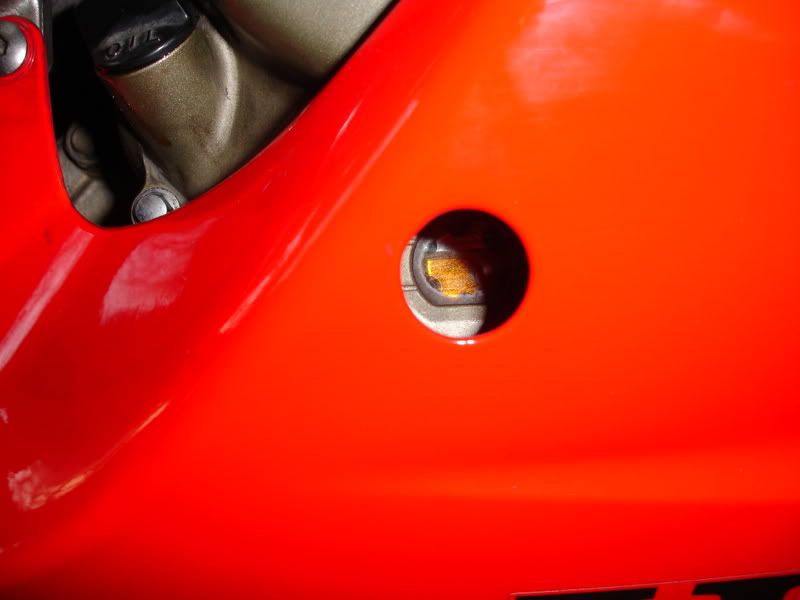
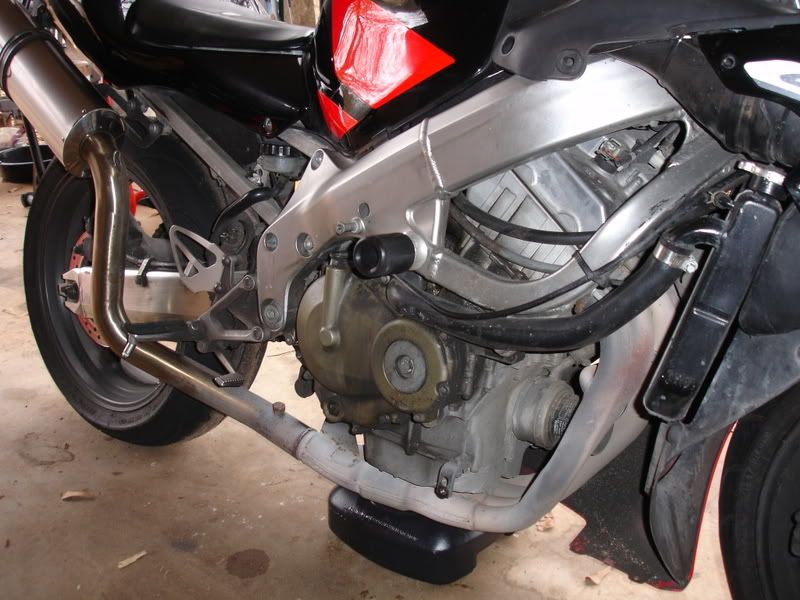
Step 2
Remove the right side fairing
![Image]()
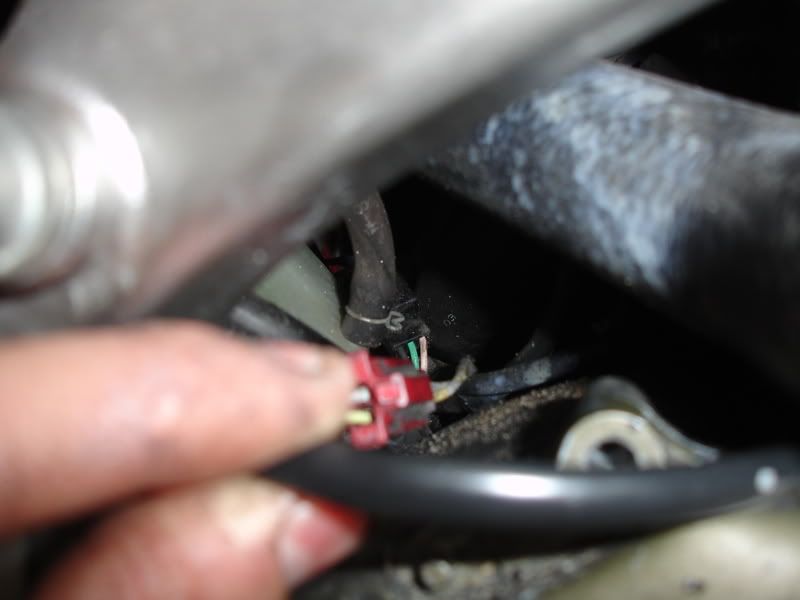
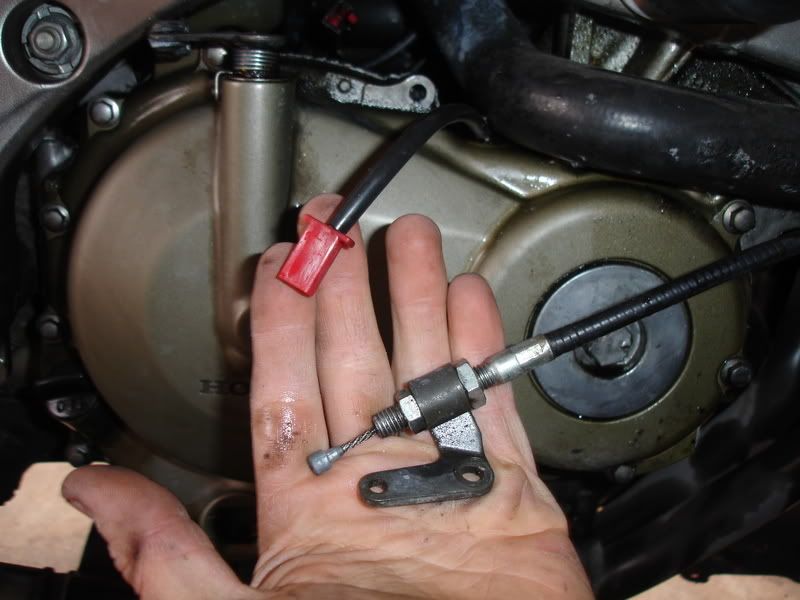
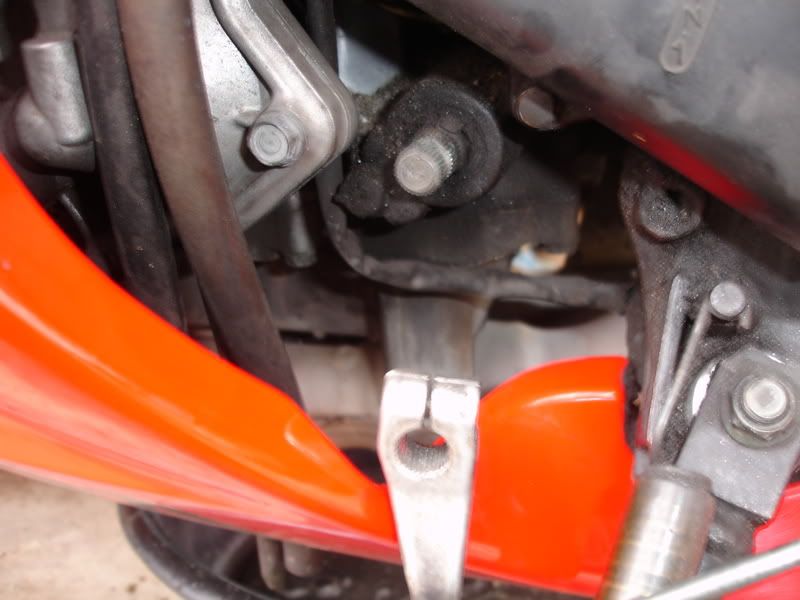
Step 3
-Remove the 8mm bolt and remove the clutch cable from the release arm
-Unplug the red 2P crankshaft position sensor connector
![Image]()
Step 4
-Remove the remaining 8mm bolts from the clutch cover
![Image]()
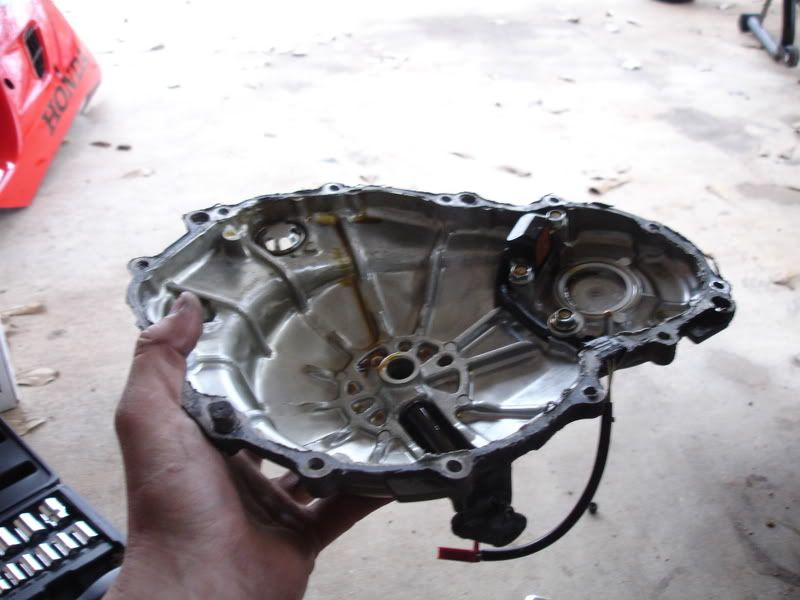
-Then it may be necessary to gently tap the cover with the mallet from the backside to break the seal, then remove the clutch cover
![Image]()
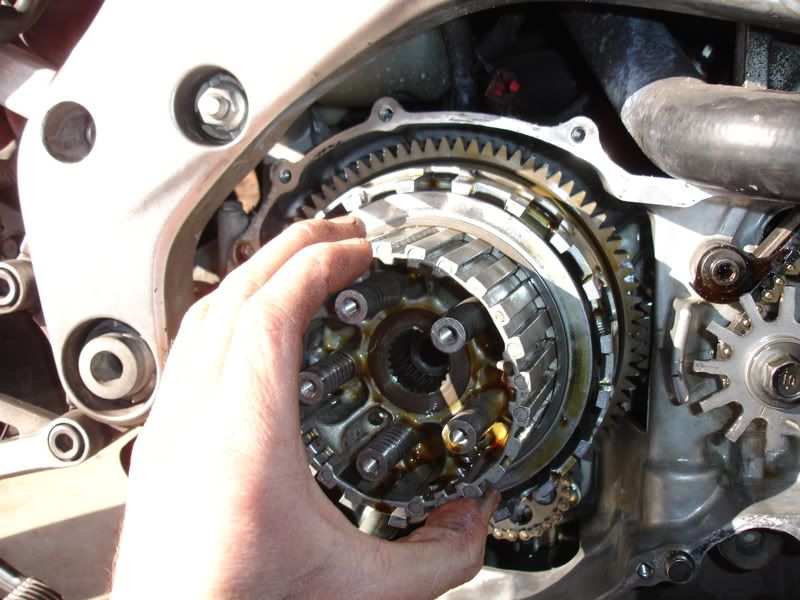
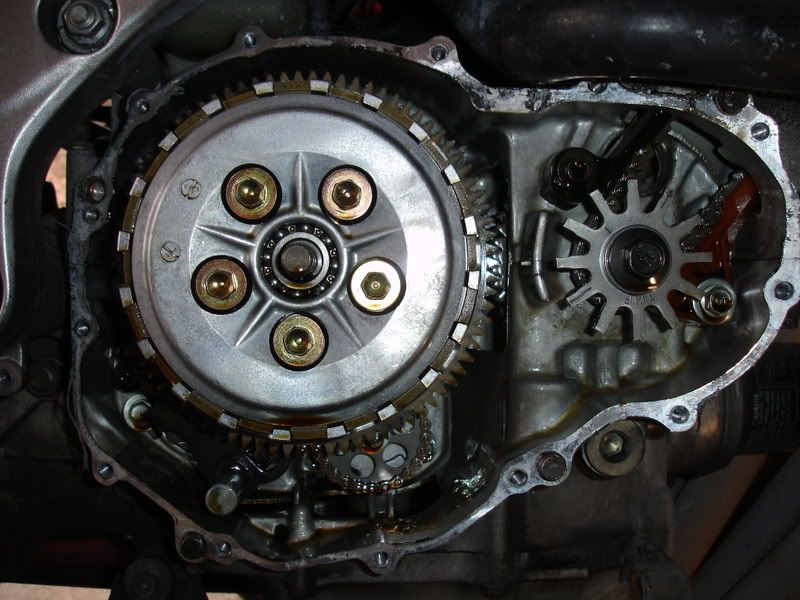
Now here's what you'll see next
![Image]()
Step 5
*** IMPORTANT *** Place shop rags over openings to oil pan... parts WILL drop!!!
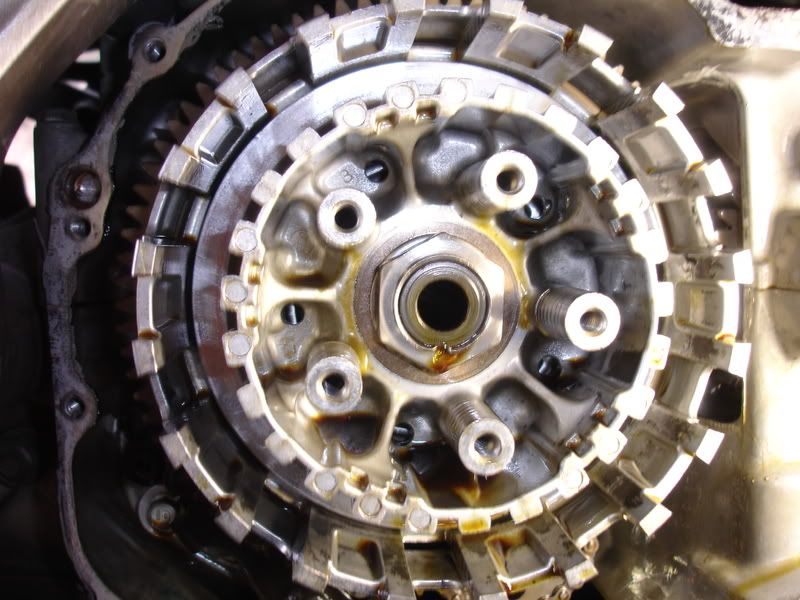
-Remove the (5) 10mm bolts and springs from the clutch pressure plate
![Image]()
-Remove the pressure plate
![Image]()
Step 6
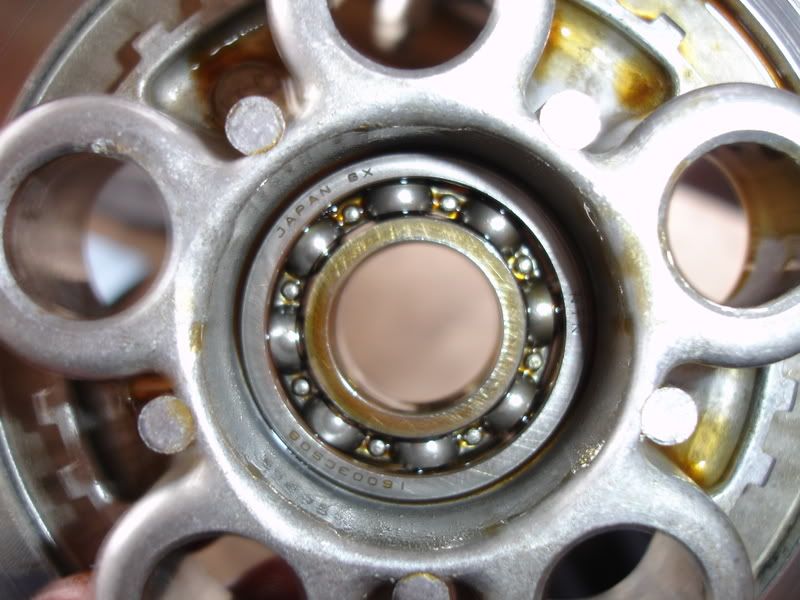
-Inspect the lifter release bearings for wear or damage. Make sure all roller balls are present and move freely and smoothly
![Image]()
-Inspect the lifter piece for wear or damage
![Image]()
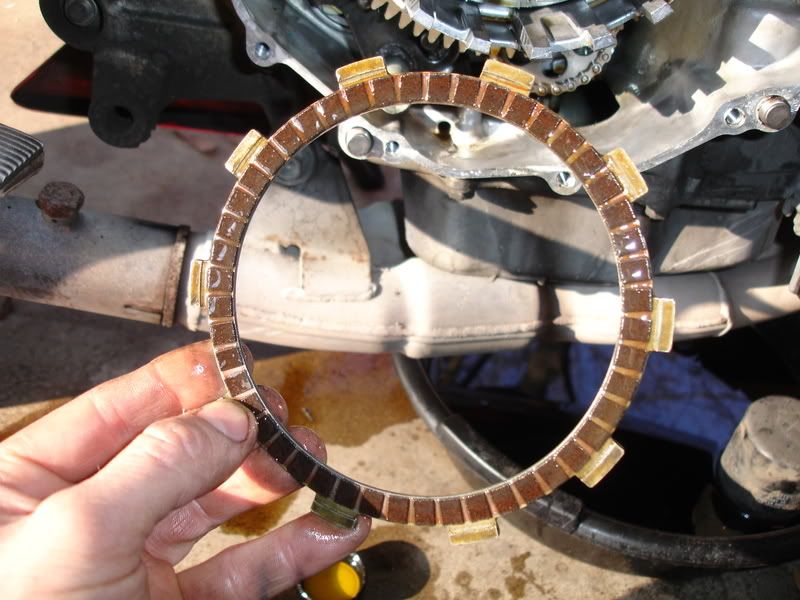
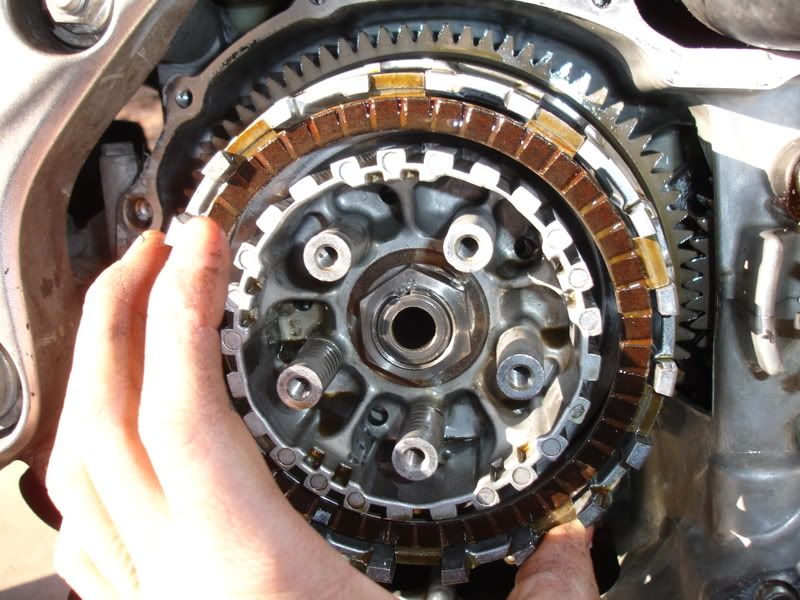
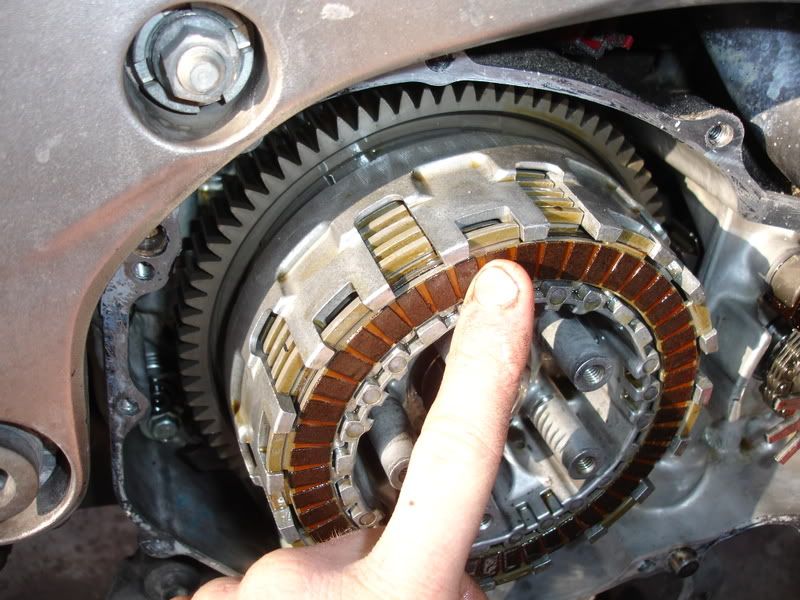
Step 7
-One by one, remove each clutch friction disc and steel disc. Place in a pile (somewhere clean) face down in the order that you take them out. After the last friction disc is removed, remove the friction spring and spring seat that will be in the back of the basket. Be sure and check the pressure plate when you take it out, that the first couple discs don't stick to it. Clutch discs and steel plates have already been removed in picture. You should have: eight clutch discs (friction), seven clutch plates (steels), one spring seat, and one friction spring
![Image]()
-This is how your pile should look
![Image]()
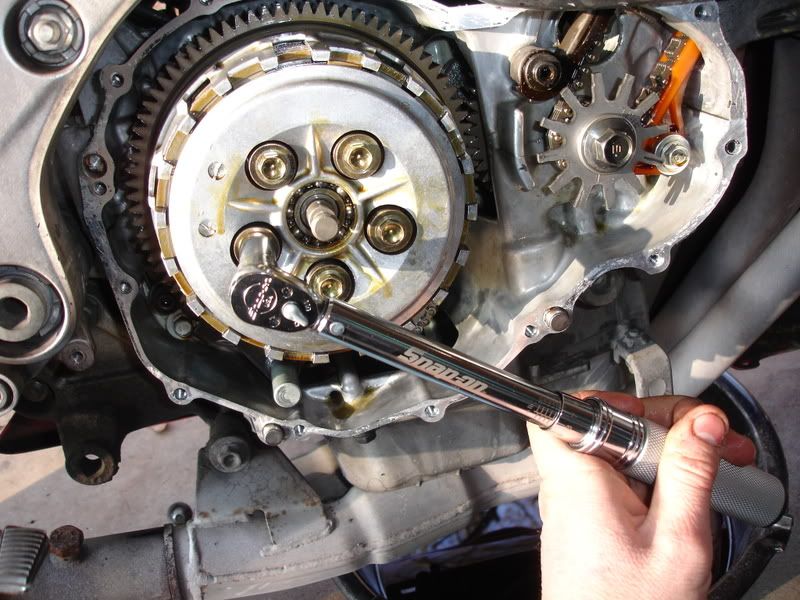
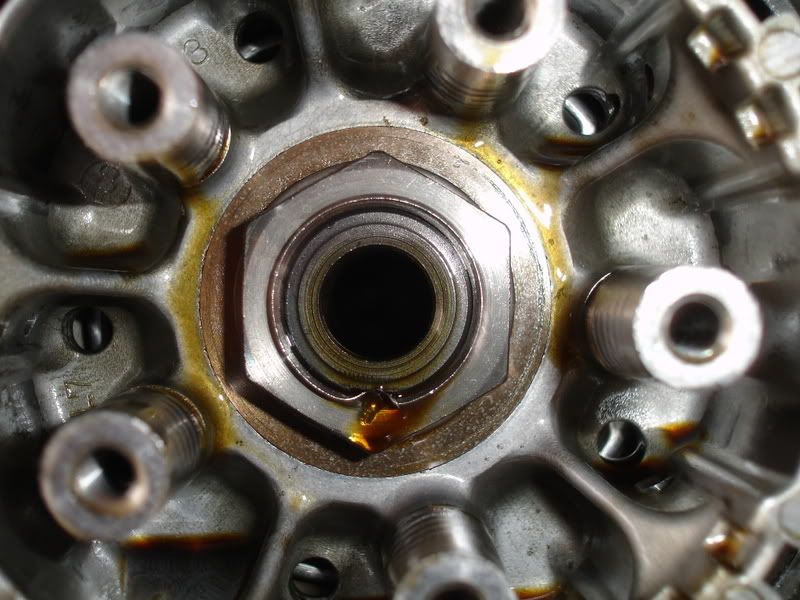
Step 8
-Using a flathead screwdriver or chisel, and a hammer, unstake the nut as much as possible
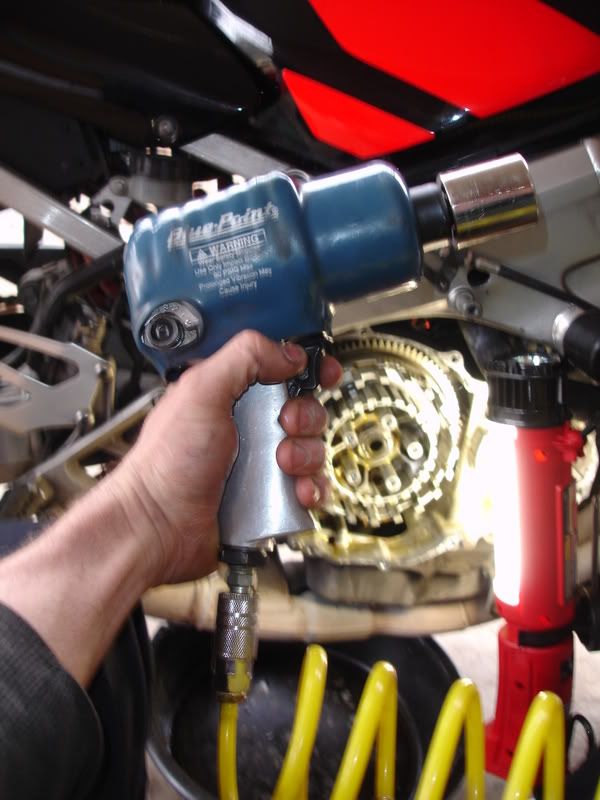
-Using the 30mm socket, and either an impact gun or breaker bar, remove the clutch center nut. If you don't have the clutch center holder tool, the easiest way to hold the clutch center from turning is to shift into 5th or 6th gear (you'll have to use one hand to turn the clutch center as you shift through the gears to make them mesh). Once you get in gear, use your foot to step down hard on the rear brake pedal as you remove the nut. It's easy with an impact gun, much harder with a breaker bar. After the nut is removed before removing the clutch center, shift the transmission back to neutral. Again it will be necessary to spin the clutch center back and forth as you shift through the gears. It will spin freely once you get to neutral
![Image]()
Once again... highly recommended!!
![Image]()
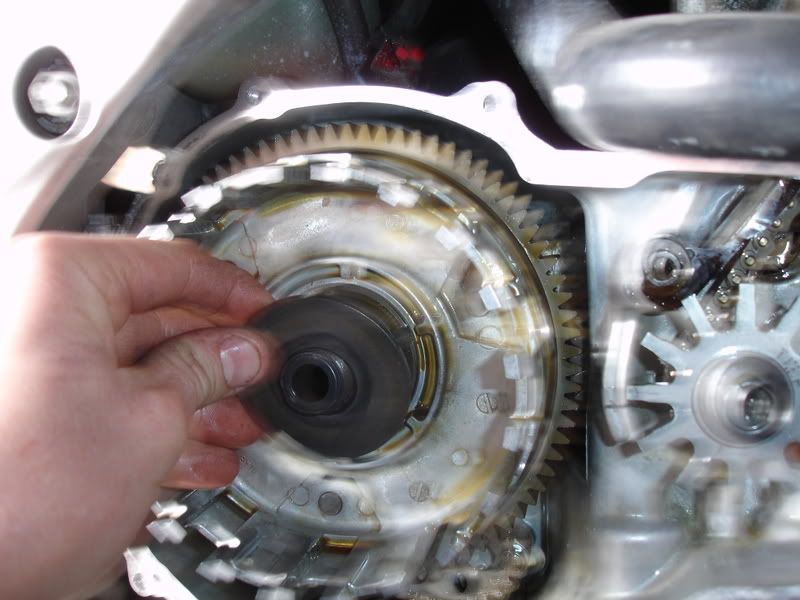
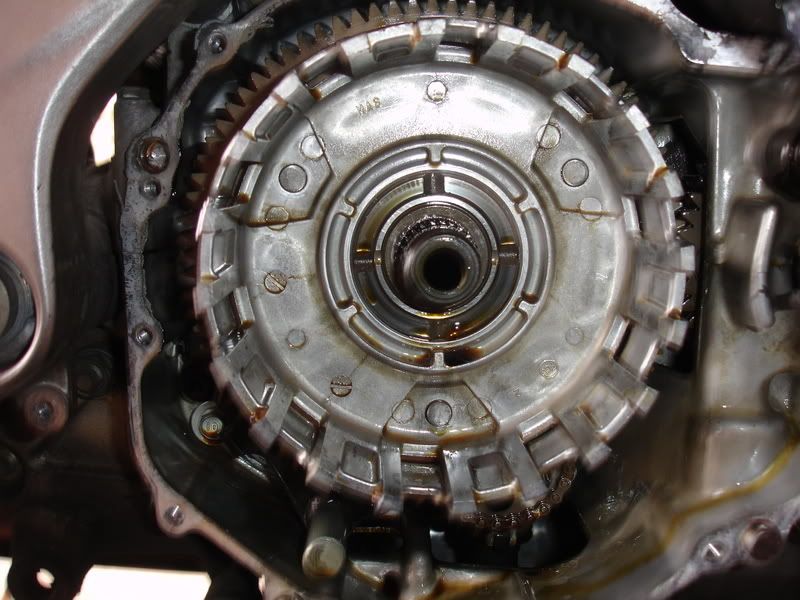
-Once the nut is off, the clutch center will slide right off. Take care not to lose the lock washer that is behind the nut, or the large washer that's on the back side of the clutch center that may come off with it when you pull it off
![Image]()
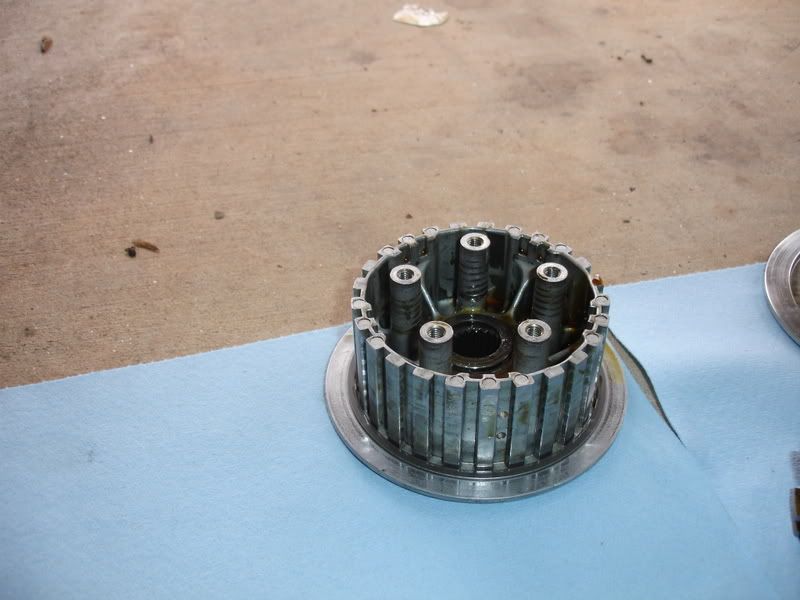
Clutch center
![Image]()
Step 9
-Remove the clutch outer basket. This is kind of tricky and hard to describe... there's 2 gears on the crankshaft that mesh with the gear on the outer shell, called 'scissor gears'. They are not aligned with each other and make the clutch outer rather tight to get out and back in. You need to turn the crank until you see a small hole in the gear on the crank, and stick a screwdriver in the hole and then hold tension on the crank to make the 'scissor gears' align with each other, so that you can remove and install the clutch outer
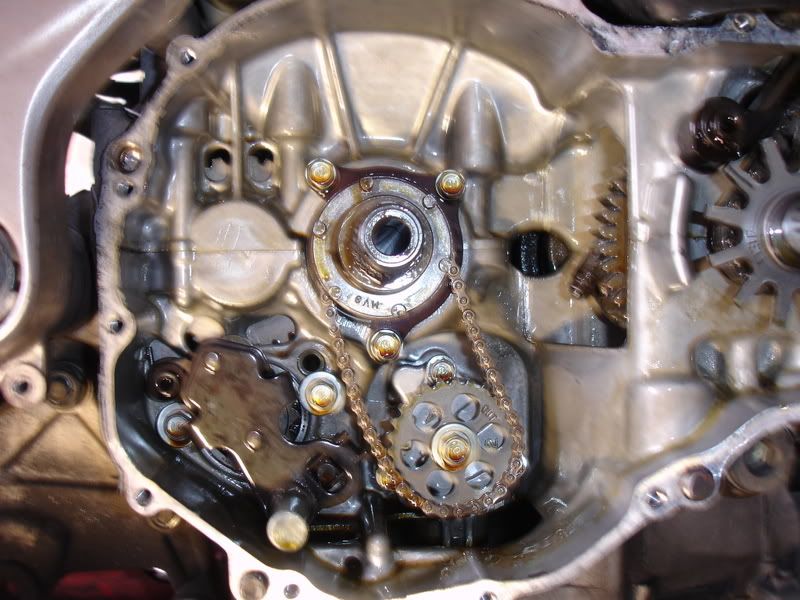
This is what you'll now see
![Image]()
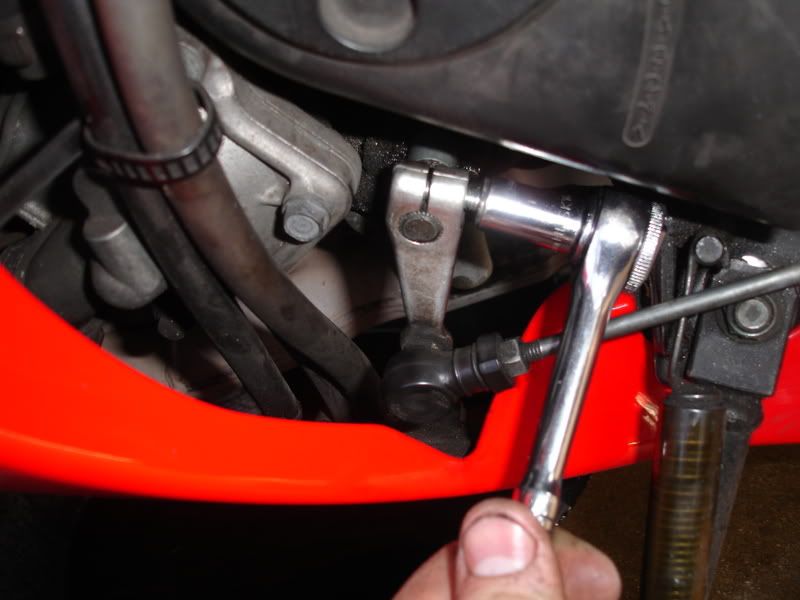
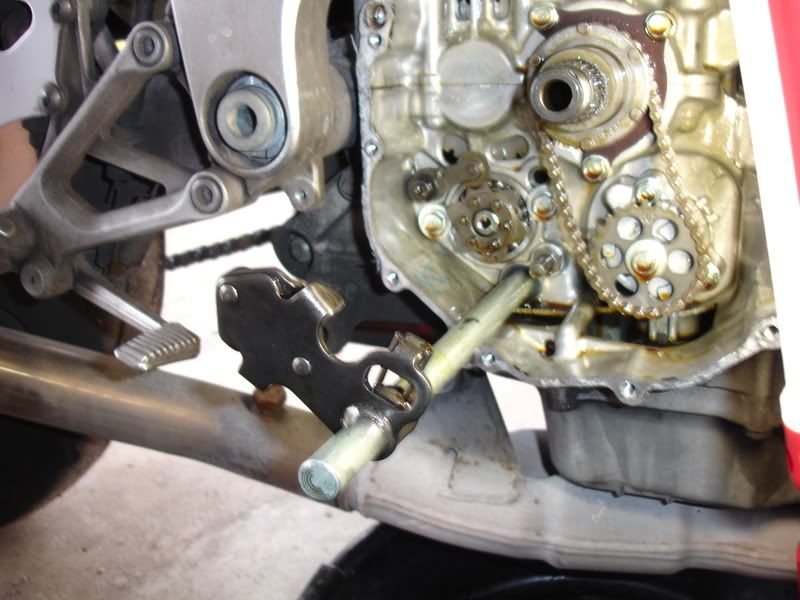
Step 10
-Remove the 10mm bolt on the gearshift linkage and remove from the gearshift spindle
![Image]()
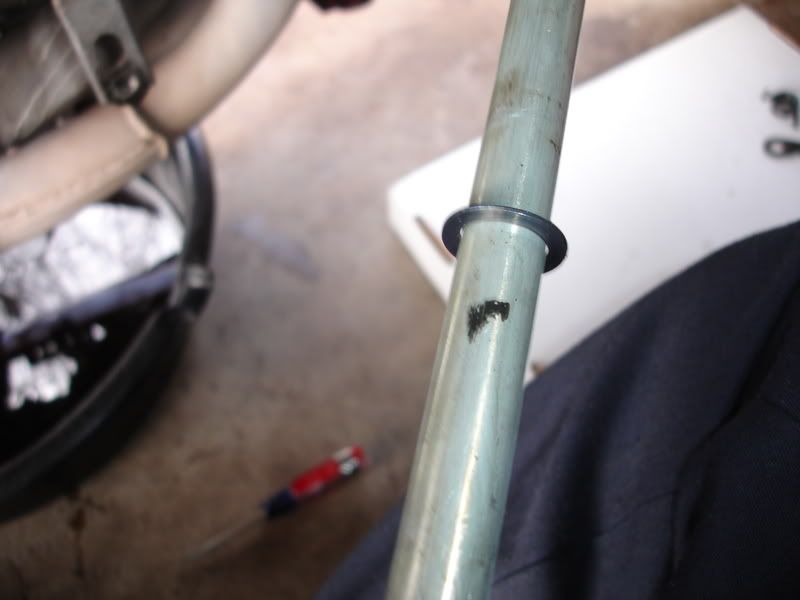
-Remove the gearshift spindle and thrust washer from the crankcase
![Image]()
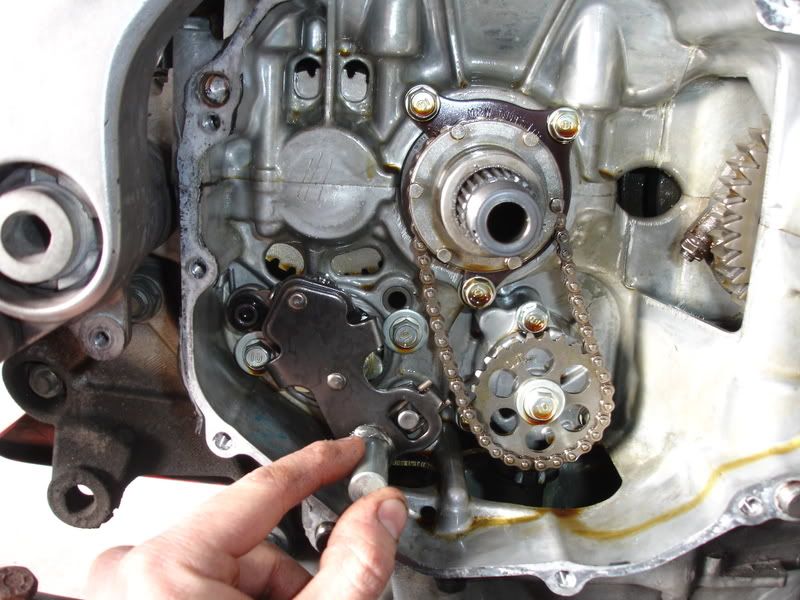
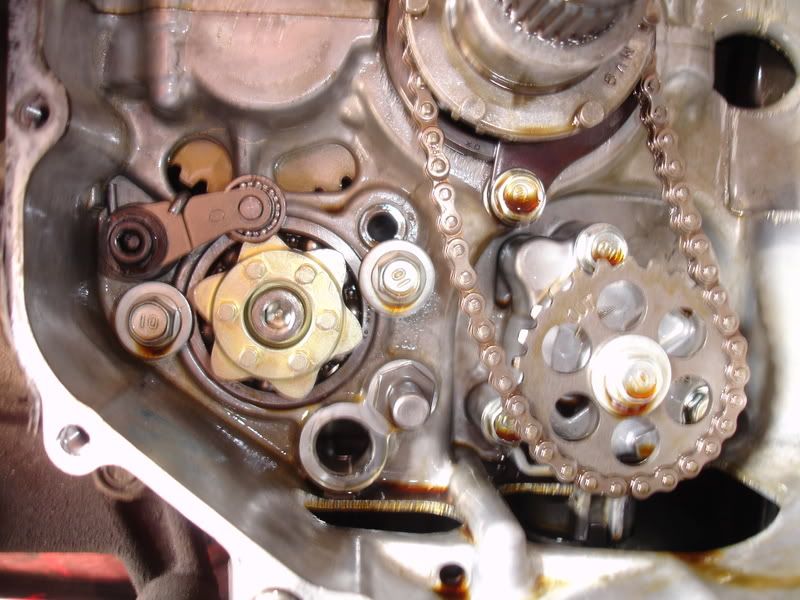
Now here's the parts that will be changed
![Image]()
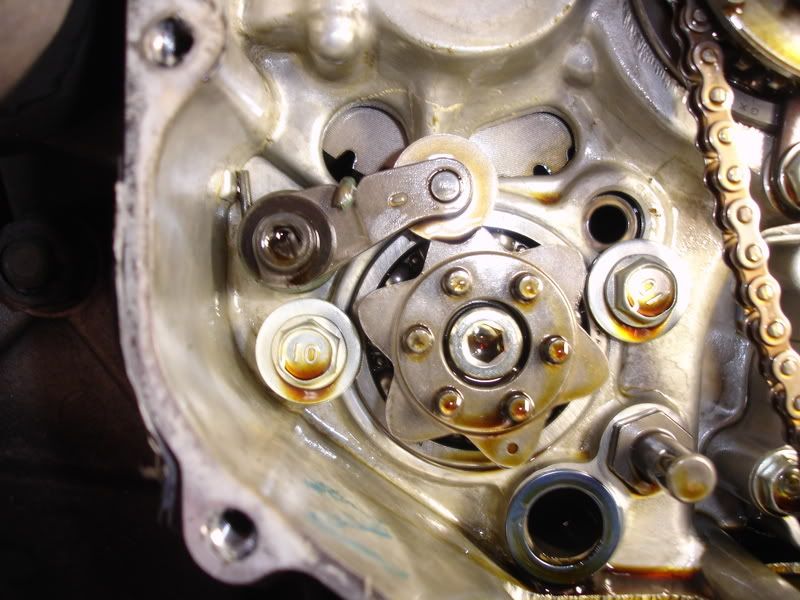
Step 11
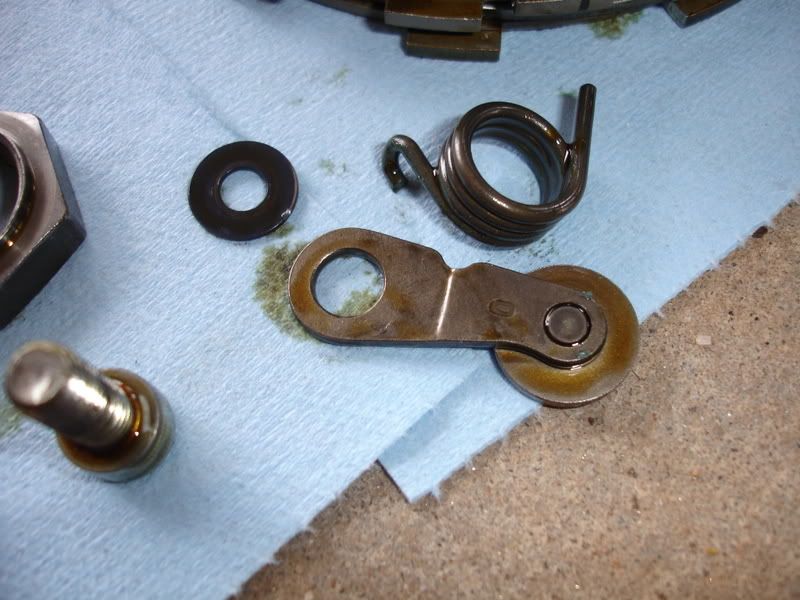
-Remove the 5mm hex bolt from the detent arm and remove the arm, spring, and washer
![Image]()
-Remove the 6mm hex bolt from the shift star (also referred to as the gearshift cam), and remove the shift star
Parts comparison -- Factory Pro EVO shift star kit on left, OEM on right
Front
![Image]()
Rear
![Image]()
Step 12
-Install the new detent arm, spring, and washer. Torque the bolt to 108 in-lbs (9 ft-lbs)
![Image]()
Step 13
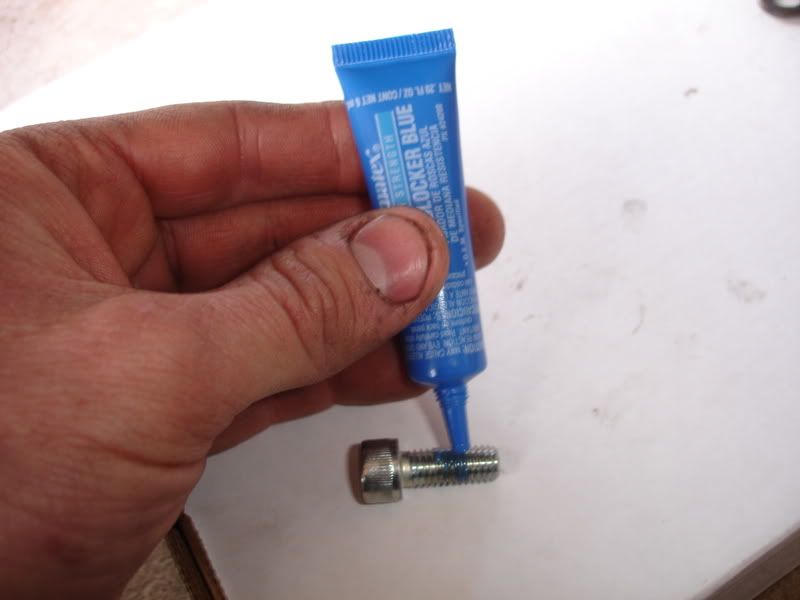
-Apply blue loc-tite to the 6mm bolt for the shift star
![Image]()
-Using a flathead screwdriver, hold the detent arm up while you install the shift star. I forgot to take a picture, but there is a dowel on the shaft that the shift star bolts to. Align the hole on the back of the shift star with the dowel on the shaft. This can take several tries and can be a little tricky... just be patient and keep trying, and you must push it in firmly for it to seat properly. You can tell when the dowel is in the hole when you rotate it back and forth you can feel the shift forks moving around
-Once in place, tighten the bolt to 204 in-lbs (17 ft-lbs)
![Image]()
Step 14
-Install the gearshift spindle, making sure the thrust washer is in place. When it feels like it's in as far as it will go, you need to lift up on the part that goes over the shift star. It's spring loaded and fits 'over' the dowels on the shift star. When you get it lifted up enough, the spindle will slide in just a little bit further
![Image]()
![Image]()
I made this as detailed as I could, although I left out a few things in the pics but I'll explain as best I can
Cost
* $180 for the kit. I got mine from Solo Moto Parts they were about $20 cheaper than getting from Factory Pro, and free shipping on orders over $99
Bikes
* Any 01-06 F4i specifically. Probably very similar for others
Tools and Materials Required
* 30mm impact socket (1/2" drive)
* Impact gun STRONGLY recommended (electric or air, doesn't matter)
* 1/2" drive breaker bar if no impact gun is available
* 5mm and 6mm HEX head sockets (also called allen head)
* 8mm and 10mm sockets (1/4" drive)
* 10mm, 12mm, and 14mm sockets (3/8" drive)
* Short 1/2" drive extension
* 6 inch 3/8" extension
* 6 inch 1/4" extension
* 1/4" and 3/8" hand ratchets
* in-Lb torque wrench (3/8" drive) capable of 108 in-lbs
* ft-Lb torque wrench (1/2" drive) capable of 94 ft-lbs
* Medium sized flathead screwdriver
* 3+ lb hammer
* Rubber mallet (or rubber or wooden handle from regular hammer works too)
* Hondabond or equivalent GREY silicone gasket maker (must have high oil resistance!!)
* Brake parts cleaner
* Silicone gasket remover (not completely necessary, but helps)
* Blue loc-tite
* Digital caliper or micrometer (optional for measuring clutch discs and springs)
* Oil drain pan
* Clean engine oil (and oil filter too... might as well)
* Lots of shop rags
* Clutch center holder tool (optional special tool). Honda P/N 07724-0050002
Time Required: Depends on skill level, but for most mechanically inclined people, and especially those that are very anal and picky about everything, I'd allow a good part of an afternoon to complete
The Kit

Step 1
Drain the engine oil. Make sure the bike is in neutral

Step 2
Remove the right side fairing
Step 3
-Remove the 8mm bolt and remove the clutch cable from the release arm
-Unplug the red 2P crankshaft position sensor connector
Step 4
-Remove the remaining 8mm bolts from the clutch cover

-Then it may be necessary to gently tap the cover with the mallet from the backside to break the seal, then remove the clutch cover
Now here's what you'll see next
Step 5
*** IMPORTANT *** Place shop rags over openings to oil pan... parts WILL drop!!!
-Remove the (5) 10mm bolts and springs from the clutch pressure plate

-Remove the pressure plate

Step 6
-Inspect the lifter release bearings for wear or damage. Make sure all roller balls are present and move freely and smoothly
-Inspect the lifter piece for wear or damage

Step 7
-One by one, remove each clutch friction disc and steel disc. Place in a pile (somewhere clean) face down in the order that you take them out. After the last friction disc is removed, remove the friction spring and spring seat that will be in the back of the basket. Be sure and check the pressure plate when you take it out, that the first couple discs don't stick to it. Clutch discs and steel plates have already been removed in picture. You should have: eight clutch discs (friction), seven clutch plates (steels), one spring seat, and one friction spring
-This is how your pile should look

Step 8
-Using a flathead screwdriver or chisel, and a hammer, unstake the nut as much as possible
-Using the 30mm socket, and either an impact gun or breaker bar, remove the clutch center nut. If you don't have the clutch center holder tool, the easiest way to hold the clutch center from turning is to shift into 5th or 6th gear (you'll have to use one hand to turn the clutch center as you shift through the gears to make them mesh). Once you get in gear, use your foot to step down hard on the rear brake pedal as you remove the nut. It's easy with an impact gun, much harder with a breaker bar. After the nut is removed before removing the clutch center, shift the transmission back to neutral. Again it will be necessary to spin the clutch center back and forth as you shift through the gears. It will spin freely once you get to neutral
Once again... highly recommended!!
-Once the nut is off, the clutch center will slide right off. Take care not to lose the lock washer that is behind the nut, or the large washer that's on the back side of the clutch center that may come off with it when you pull it off
Clutch center
Step 9
-Remove the clutch outer basket. This is kind of tricky and hard to describe... there's 2 gears on the crankshaft that mesh with the gear on the outer shell, called 'scissor gears'. They are not aligned with each other and make the clutch outer rather tight to get out and back in. You need to turn the crank until you see a small hole in the gear on the crank, and stick a screwdriver in the hole and then hold tension on the crank to make the 'scissor gears' align with each other, so that you can remove and install the clutch outer
This is what you'll now see
Step 10
-Remove the 10mm bolt on the gearshift linkage and remove from the gearshift spindle
-Remove the gearshift spindle and thrust washer from the crankcase
Now here's the parts that will be changed
Step 11
-Remove the 5mm hex bolt from the detent arm and remove the arm, spring, and washer
-Remove the 6mm hex bolt from the shift star (also referred to as the gearshift cam), and remove the shift star
Parts comparison -- Factory Pro EVO shift star kit on left, OEM on right
Front

Rear

Step 12
-Install the new detent arm, spring, and washer. Torque the bolt to 108 in-lbs (9 ft-lbs)

Step 13
-Apply blue loc-tite to the 6mm bolt for the shift star
-Using a flathead screwdriver, hold the detent arm up while you install the shift star. I forgot to take a picture, but there is a dowel on the shaft that the shift star bolts to. Align the hole on the back of the shift star with the dowel on the shaft. This can take several tries and can be a little tricky... just be patient and keep trying, and you must push it in firmly for it to seat properly. You can tell when the dowel is in the hole when you rotate it back and forth you can feel the shift forks moving around
-Once in place, tighten the bolt to 204 in-lbs (17 ft-lbs)
Step 14
-Install the gearshift spindle, making sure the thrust washer is in place. When it feels like it's in as far as it will go, you need to lift up on the part that goes over the shift star. It's spring loaded and fits 'over' the dowels on the shift star. When you get it lifted up enough, the spindle will slide in just a little bit further